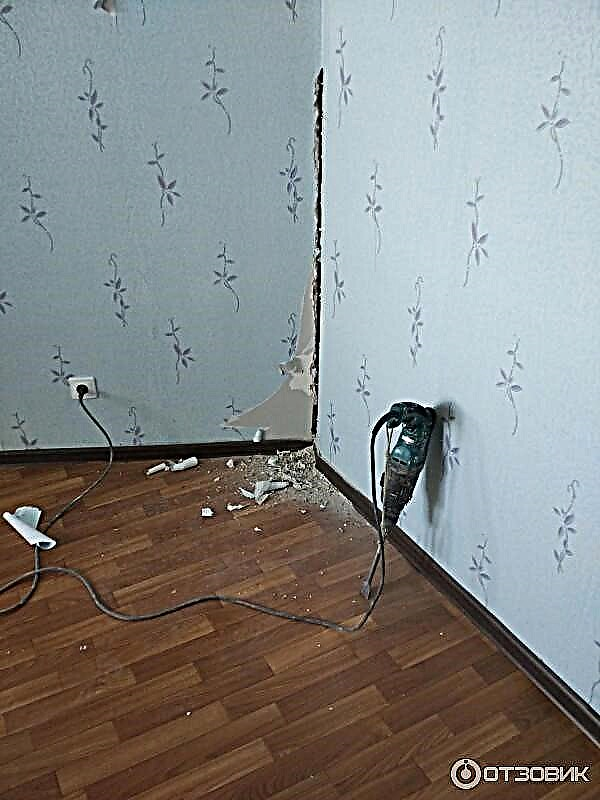
Anyone who at least once went through a repair shudders a little at the thought that again they will need to remove the old tile. Even repair technicians do not like this process and often refuse customers, or they charge very, very expensive for their services. It would seem that breaking is not building. What can be difficult to dig out old tiles? If you think so too, there are many discoveries ahead of you! Even with a puncher, tiles are not always easily removed, and when you need to keep a tile intact, the task is complicated several times. There are several basic ways to remove tiles from the wall and floor. Consider everything, and you choose the one that is more suitable in a particular situation.
Tools and Training
Going to dismantle the tile, each of us wants to inflict minimal damage to the wall. Someone calls a prerequisite and minimal damage to the tile itselfso that it can be reused. The choice of installation method depends on the purpose: either you try to save the tile, or you don't care what happens to him.
Moreover, The method of removing the tile also depends on how and on which surface it was attached:
- if the tile was mounted on a cement-sand mixture, and even with plasticizers, and even experienced craftsmen who did their job as efficiently as possible, it will not work to remove the tiles without damage with a probability of 99%. In this case, only a hammer drill with a chisel tip will help. Even the specialists cannot preserve the integrity of the tile,
- if the tile was mounted on tile adhesive, then the probability of removing it without damage is much higher. Be prepared for what losses will be anyway. It will not be possible to maintain the integrity of all tiles. Sometimes part of the elements damaged during dismantling reaches 50%, so weigh well if the game is worth the candle.
- with concrete and brick surface it is possible to remove the tile, but if you have it glued to drywallthen get ready for massive destruction. In the best case, the tile will be completely broken, in the worst - it will be necessary to change the drywall partition.
Specialists have one uncomplicatedguide to determine if there is a chance to remove the old tile without damage. You need to go over the entire surface of the tile to tap it with a spatula with a rubber mallet. The movements should be light so that you can detect the presence or absence of voids under the tile. If they are, and in large quantities, then you can try to remove the tile in more gentle ways to save the tile and its further use, for example, in the country.
From the tools you may need:
- a hammer drill with a chisel attachment, some use nozzles in the form of a drill, bits, chisels,
- chisel or chisel
- spatula, you can several. Stronger products are preferred.
- hammer,
- Chisel and grout scraper
- you may need a screwdriver with a handle, which is convenient to strike,
- not necessarily, but a grinder with a nozzle can be useful for cleaning the seams between the tiles,
- a container of warm water, sponges,
- drill with a drill of 6 mm,
- red-hot wire with a diameter of 3-4 mm.
Of course, not all of these tools can come in handy right away - it all depends on the chosen method.
Do not forget to take care of personal security. Use safety glasses, a mask or a gauze bandage, tight gloves, and even better, wear a protective suit.
No. 1. How to remove a tile without damaging it
Before you try to crank up this experiment on the scale of your apartment, I would like to remind you once again - to remove the whole tile safe and sound will not work. Losses will be anyway. The result depends not only on the composition on which the tile was fixed, but also on the quality of the preparatory work. The preparation is as follows:
- prepare a warm soapy solution, moisten thoroughly with it all the seams between the tiles,
- carefully remove the old grout with a chisel, putty knife, paint knife or triangular screwdriver. If you have the skill to work with the tool, you can use the grinder and walk the disc at the seams,
- wipe the edges of the tile with a sponge dipped in the same solution. If there is a drill and a special nozzle-brush, then you can use them - the result will be achieved more efficiently,
- leave the tile for a while so that the water slightly soaks the glue or solution.
A hammer will not be needed - you have to act with a hammer and a chisel. It is slow, difficult and painstaking, but if maintaining the old finish is important, this is the only way. The procedure is as follows:
- if the top, side or bottom row is not open, you will have to sacrifice one tile to ensure normal access. As a rule, this is not required, but if suddenly the tile covers the entire surface of the wall, then with a spatula and a hammer break the tile somewhere on top,
- when normal access to the tiles is open, you need to drive a chisel, a chisel with a thin blade or a spatula between the tile and a layer of glue and tap the tool with a hammer. Shots must be accurate, but strong. If after several strokes the tile stays firmly in one place, there is a chance that it will crack from subsequent strokes. Try to pry it on the other side. If she didn’t give in again, she’ll have to come to terms that you won’t remove her whole, and finish her off. Remember, no one promised you a 100% result? If the tile moves away from the wall, then you must be especially careful when it is repelled by 2/3 - this is the dangerous moment when you need to make every effort to keep the corners of the tile intact. Pull the tiles from different sides,
- they knock down tiles
- From one row to another, move from top to bottom. This reduces the likelihood of tile collapse and injuries,
- You can clean the wall of old glue or mortar with a punch.
In a similar way it will turn out to remove the tile laid on glue, or that which was mounted on a solution with violation.
Training
It is important to carry out dismantling work so as not to damage the plumbing and furniture in the bathroom. If possible, you need to free the room. The bath and sink should be wrapped with a soft cloth and covered with foil. If the tile will be removed only from the walls, it will be necessary to protect the floor from heavy fragments. It can be hidden under a sheet of plywood, cardboard, dense polyethylene.
 If you remove the bath, it will be more convenient to remove the tiles, and the plumbing device itself will remain unharmed.
You should consider your own safety. You need to work in a respirator or gauze bandage. To protect against injury, you will need tight gloves, glasses, shoes with a hard toe and clothing that closes the body as much as possible.
Important! Under the tiles, communications can take place. It is necessary to mark their location in advance, and work on these sites especially carefully.
Depending on the selected dismantling method, different tools will be required:
- hammer drill
- renovator
- chisel or chisel,
- hammer,
- putty knife.
To keep as many fragments of masonry as possible intact, you can glue the edges of the tile with several layers of masking tape. This will significantly increase the dismantling time, but will save on the purchase of a new tile for the repair of another room.
Chisel or trowel
This method is quite quiet and neat, but it will take a lot of time. If the tile needs to be saved, then first you need to expand the seams, this will allow you to divide the finish into separate fragments. How to do this depends on the composition of the grout mixture:
- If it is cement-based, you should use a construction knife with a durable blade, a hacksaw for metal or a special tool with a serrated blade. During operation, it is important not to damage the edges of the tile, it is better to hold the tool in the center of the seam, cleaning the grout to the maximum depth.
- Particularly strong epoxy grout will need to be pre-softened with a building hair dryer, then clean the composition with a sharp tool.
To remove the grout to a shallow depth, you can use a construction drill with a disk nozzle or renovator, then finish the work with a knife.
Advice! In order not to breathe dust while sawing seams, work in tandem with an assistant. His task is to direct the vacuum cleaner towards a working power tool.

You need to start from the top row. The first tile will have to be smashed with a hammer or cut diagonally. Further, the work is carried out in stages with each fragment separately:
It is necessary to work with the free edges of the tile. First you need to knock down the glue around the fragment so that it does not interfere with installing the chisel under the tile, and not on its edge. Then, in several sections of the free edge of the tile, substitute the chisel at an angle of 45 degrees and hit it with a hammer. Vibration, which will be transmitted to the entire fragment, will gradually separate the tile from the base. Remove the rest of the trim moving in horizontal rows from top to bottom. 
Instead of a chisel, you can use a narrow spatula. First you need to separate the tile from the glue from the free sides: put the canvas with a trowel angle on the glue and knock it with a hammer with light strokes. This creates small gaps between the tile and the wall. Then insert a spatula with a wider canvas under the fragment and gradually drive it with a hammer between the tile and the glue. The angle at which the tool is directed should be minimal, ideally the canvas is set close to the wall. If the tile is large, the length of the spatula may not be enough, then you can use a thin metal rail, inserting it under the tile with light hammer blows.

Sometimes it is especially difficult to dismantle a tile. For example, if it was put on bare drywall. In this case, the adhesion with the base will be very high and it is impossible to knock down the tile without damaging the partition. There is a chance to separate the finish from the drywall if it was previously puttied. In this case, it is better to remove the tile with a spatula.
If the safety of the tile is not important, you can work with a chisel and a hammer more actively and without jointing tile joints.
The dismantling of the floor in the bathroom is carried out similarly, with the only difference being that you can start it from any section of the finish.
Dismantling technology
There are two options for how to dismantle the cladding:
- Radical, after which the tile can not be used.
- Gentle when the material can be used later.

The first way is much simpler. But, they resort to it if the tile is in terrible condition and it is not suitable for further use. But in order to save, a gentle method is used. Be that as it may, removing tiles from walls or floors requires safety precautions. In addition, the work can not do without such tools:
- rotary hammer with a nozzle for dismantling,
- a small metal spatula,
- plastic film or any protective material,
- safety glasses, respirator and gloves,
- chisel and chisel
- hammer,
- drill with different drills.
The first step is preparing a place for work. Before you remove the tiles from the wall, you need to protect the floor. To do this, a plastic film or other protective material is laid on it. And if you want to remove the old tiles from the walls of the bathroom, then the bath itself and the toilet are covered with cardboard.
During dismantling, small pieces of glue or ceramics will fly off, so special glasses are needed to protect the eyes. Gloves will help protect your hands, and in order not to breathe dust, use a respirator or gauze moistened with water.
Start cleaning tiles from the walls from above, moving down. To remove it you will need a chisel and a chisel. The work is done in turn, one at a time removing each element. If the tile holds very tightly, then it remains to break it with a hammer.
In order to further align the walls after removing the tiles, you will need to remove the old glue or cement mortar. In this case, too, can not do without a chisel and a hammer. Sometimes resort to the help of a perforator. So the work is done several times faster. Old cement will interfere with good adhesion with the new finishing material. This was the technology of how to knock tiles off the wall. Consider the whole process in more detail, as well as learn the advice of professionals.
Tips for removing tiles from wall surfaces
To remove the cladding from the walls is not entirely quick and easy. It is especially difficult to work when you need to remove the tile from the wall without damaging it. Work requires special care. The most important thing in the work is to follow all the technological processes and to carry out the work efficiently in the desired sequence.
A required attribute that will help speed up the process is a puncher. With it, you can control the impact force placed on the wall. Particular attention should be paid to complex sections of the walls where communication systems pass. It is important not to damage them by aligning the impact force of the hammer drill.
If you want to carefully remove one tile from the wall without touching the others, a spatula is used. According to technology, the first thing to do is remove the grout. Further, using a drill, several holes are made around the perimeter of the tile. Thanks to this, you can repel the tile from the wall without hitting the others.

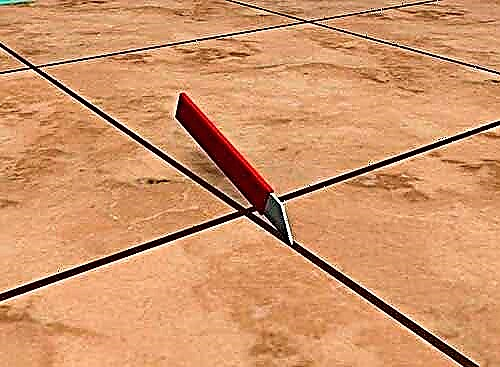
Note! There is another option for removing cladding. To do this, it must be cut diagonally using a glass cutter.
Tile Removal Methods
In many ways, the method of removing tiles depends on the composition on which it was fixed. Usually used cement-sand mortar or special glue.
Option one concerns the lining laid on the cement mortar. It all comes down to using a punch. At the same time, removing the tile from the wall in the bathroom without damaging it will be problematic. For the perforator, a nozzle with a chisel is used, the lining and cement mortar are beaten off the surface.
But as for the removal of tiles mounted on tile glue, it will be much easier to save the lining in this case. There are several development options. If you want to replace one or more elements that have been damaged, the sequence is as follows:
- Using a special scraper, you need to remove all grout around the product. This is done carefully so as not to damage the remaining elements.
- To loosen the tile, several through holes are made in it with a drill.
- In order to remove an unusable tile, you need to pry it with a chisel and knock on the surface with a hammer. The tile should easily move away from the surface.
- It remains to remove the remnants of glue on the wall. Make it easier. Then you can glue the new cladding to this place.

Now consider the second way, how to dismantle the tile without damaging it. This can be done with the lining fixed to the tile adhesive. The sequence is as follows:
- The seams around the perimeter of the tile are cleaned from grout. A spatula or mounting knife is used.
- With the help of a chisel or metal spatula, the tile gently pokes. To do this, the tool is installed under the tile, after which the hammer must be gently and without sharp movements tapped on a spatula or chisel.
- Point vibrations will help the tile to separate from the glue. If he holds very tightly, you can do these manipulations on each of its 4 sides.
- The product is carefully removed.


It remains to be understood how to remove old glue from ceramic tiles. To do this, you can use a grinder with a nozzle for stripping. Then all glue will be removed.
It is much easier to dismantle if cladding is no longer required. The instruction is as follows:
- To protect the face, hands and eyes, all protective elements are worn. A plastic film is spread on the floor.
- Using a hammer drill with a nozzle in the form of a chisel, the dismantling of the lining begins. It is necessary to pry it at an angle, starting from the seams.
- The remaining solution can be removed with a hammer.
Advice! Old tiles, broken into pieces, should not be thrown away. It is useful for creating garden paths. Or you can make a beautiful mosaic out of it.
Now everyone knows how to remove ceramic tiles from the wall. It remains only to put everything into practice.
Removing material from the ceiling
Although today tiles are rarely laid on the ceiling, before this could often be found. How to dismantle ceramic tiles in this case? Since during work you have to raise your head up, your eyes and respiratory tract must be protected. The same goes for furniture and other elements. Falling tiles can damage them.
Dismantling works begin from the corner portion of the ceiling. The first thing you can try to remove the tile with a spatula. If this is done easily, then no additional tools will be required. Otherwise, you need a chisel and a hammer. With them, the process will accelerate.
Advice! If you remove the tile and destroy the seams between the tiles can not be a spatula or a chisel, then a punch or an electric drill is taken. The seam is drilled in several places.
Using a hammer drill and drill, it is easy to get rid of the ceiling skirting. It is important not to damage the places where the wall connects to the ceiling. And when several elements need to be removed on the ceiling, then everything is done according to the same principle as removing old tiles from the wall: for this you need to clean the seams, pry off the tile and remove it.
When the entire tile is removed, you need to remove the glue and prepare the surface for further manipulations. The glue is removed with a spatula or hammer. To simplify the task, you can slightly moisten the ceiling. To level the surface, a grinder with a grinding wheel is used. She can also remove glue from ceramic tiles in order to use it for further purposes.
After polishing, the ceiling remains primed, leveled and painted, or puttyed. Some simply sheathe him with drywall. The plus is that preliminary alignment is not necessary, the surface is smooth and ready for any finish. At this work are considered completed.
We remove a tile from a floor
Most often, tiles are laid on the floor with a cement mortar. In this case, the dismantling process will be accompanied by noise and dust. At the same time, it is unlikely to be preserved as a whole.
To work, you will need:
So that dust and dirt do not fill the entire room, you will have to stock up on water. As always, the tile removal process begins with a grout. With the help of a mounting knife, it is removed, and the entire floor is wetted with water. It is noted that the larger the inter-tile seam, the easier it is to remove. Water, which was treated the floor, penetrates into the seams and moistens / dissolves the glue. After half an hour, you can begin work on the extraction of tiles.

To begin with, use a spatula. It must be carefully entered under the tile and try to tear it off the floor. If she did not move, a chisel will help. In the course of work, it is recommended to add water to the floor, wetting the cement mortar. As usual, if the dismantling of old tiles is difficult, a perforator is used.

When all the finish has been removed, it remains to clean the floor of cement. To do this, a knife or sandpaper is suitable. Since during the work a lot of garbage and residues will be formed, it is required to think in advance where to put them. Nearby there should be a capacious bucket, which should be carried out as it is filled.
The note! When it is necessary to remove several separate tiles on the floor, the same method is used as removing the tiles in the bathroom from the wall. To do this, the tile is diagonally cut by a glass cutter and removed with a chisel or spatula.
Ceramic tile dismantling - technology
There are two ways to remove tiles:
- without further use,
- with further use.
In any case, it is necessary to adhere to certain safety precautions when performing work. Also, to dismantle the tiles, you will need to prepare tools in the form of:
- punch with a special nozzle,
- a small spatula
- plastic film or any protective materials,
- safety glasses and gloves
- drills with a set of drills.

Initially, you should prepare a place for work. If it is necessary to dismantle the tiles located on the walls, cover the floor with a protective coating or plastic wrap. When dismantling tiles in the bathroom, it is also necessary to protect the bathtub and toilet bowl with cardboard or film.
To protect the eyes from falling into them small fragments of tiles, you should use glasses. Wear gloves to protect your hands, and a dust mask will protect you from dust. In the absence of a respirator, it is enough to fold the gauze several times and moisten it with water.
Dismantling of tiles from the walls is carried out from above, gradually moving down. Otherwise, there is a risk of a wall collapse. To remove the tiles, a chisel and chisel are used. Churning is carried out alternately, each tile is removed from the wall. If it is impossible to detach the tile, then for its dismantling it is necessary to tap on it with a hammer, breaking it into fragments.
Next, clean the wall of old cement mortar. In this case, the presence of a chisel and a hammer is required. In order to improve the adhesion of the new tile to the wall, it is necessary to thoroughly clean it from the old mortar.

Puncher
The fastest way to cope with the old coating with your own hands is with a punch and a nozzle in the form of a wide spatula. If the finish is not valuable, then preliminary preparation of the coating is not necessary.
How to dismantle the tile with a punch:
- Break one tile in the top row with a hammer.
- Bring the punch blade under the next tile in the same row at an angle of 45 °.
- Turn on the punch and pry a fragment from bottom to top if it is a floor, and sideways or down if it is a wall.
- On the wall only advance from top to bottom. If the finish does not hold well, the upper areas may collapse from strong vibration and cause injury.

Important! The hammer cannot be used if the tile is glued to drywall. Rough dismantling is only suitable for solid substrates.
If the tile needs to be kept intact, then grout should be removed before dismantling. And when working with a punch, use a wide nozzle - a flat chisel. The device must operate in the gating mode. In this case, the spatula should be installed on the glue without touching the edge of the tile. If the tile is large, the effect of vibration should be uniform: first in the center, then closer to the corners of the fragment. It is impossible to start a perforator blade deeply, otherwise the tile will crack.
When working with a punch, most of the tiles will be saved on the bathroom floor. In order to carefully and with less loss remove the tiles from the walls, you will need the help of another person who will insure the dismantled fragments from falling.
Replacing a single tile
Sometimes it is necessary to replace only one fragment of the masonry, for example, if it has a defect. Also, communications can take place behind tiles and if they are damaged, dismantling is indispensable. To carry out all work with minimal damage, you need to remove one or more tiles without damaging neighboring ones.

It is recommended to proceed as follows:
- Separate the tile to be removed from the rest of the tile. To do this, you need to clean the grout, in any way indicated above, taking into account the hardness and composition of the mixture.
- Tapping the tiles. If there are voids under it, you can simply break the fragment with a hammer. If there are no voids, drill a hole in the center of the tile with a diamond crown (or drill a few holes over the entire area) and knock down the finish with a hammer and a chisel.
- To put in place a new fragment, you will need to remove the old glue. Removing the adhesive is necessary so that the new tile is in the same plane with undamaged areas.
- Prepare the surface for the installation of a new tile: sweep off the dust and prime.
If it is not possible to purchase a tile with the same design and color instead, we recommend using decorative tiles with a pattern that will fit the interior of the bathroom.
Removing adhesive residue
For a new finish, you need to prepare the base. After dismantling, glue fragments will remain on the walls and floor. They can be knocked down with a puncher with a spatula in shock mode. In this case, the tool nozzle should be perpendicular to the wall surface. If you hold it at an angle, the nozzle will slide off and the glue will not come off the wall.
In the absence of a power tool, you can use a chisel and a hammer, removing glue residues in the same way as when dismantling tiles. Then clean the wall of debris and dust and prime.
Tile cleaning for later use
Pieces of adhesive and grout will remain on the dismantled tile. To prepare the material for re-laying, they need to be cleaned. How difficult it will be to complete this task depends on the characteristics of the glue. Sometimes mixtures are easily cleaned with a scraper, emery stone or wire brush. If the composition leaves with difficulty, it can be wetted with water and set to work when it becomes more malleable.
In especially difficult cases, when the glue is removed with great difficulty, the old tile must be soaked in saline for several hours. Then try to remove the composition with a scraper. But this is not always possible, then they use aggressive chemicals, for example, Prosept.
You can use the grinder:
How to perform the dismantling of tiles in the bathroom depends on many features: the characteristics of the base, the composition of the mixture, which was used for masonry and grouting, the presence of a tool. If you perform all the work correctly, you can save as much as 80% of the material.
Advice! If you need a master to repair the bathroom, there is a very convenient service for the selection of specialists from PROFI.RU. Just fill out the details of the order, the wizard will respond and you can choose who to collaborate with. Each specialist in the system has a rating, reviews and examples of work that will help with the choice. It looks like a mini tender. Placing an application is FREE and does not oblige you to anything. It works in almost all cities of Russia.
If you are a master, then follow this link, register in the system and be able to accept orders.
Dismantling old tiles: options and sequence of actions
Before starting work, it is important to take care of safety measures, to protect furniture and plumbing and prepare the necessary tools for removal. Dismantling is carried out in goggles and construction gloves. Work in closed tight shoes so that if the tile falls off the wall, it will not hurt your toes. Remember that fragments of ceramics are very sharp. Standard protective equipment will prevent injuries and small particles from entering the eyes and skin.
If the repair takes place in a room where there is furniture or plumbing, they also need to be protected from dirt and scratches with fragments, this will facilitate subsequent cleaning. Wrap tightly or cover all objects with a rag, and on top with polyethylene. To prevent dust from spreading, hang a well-moistened cloth in the doorway, carefully fixing it around the perimeter. You cannot work with the door closed: air must circulate in the room so that you can breathe easier.
Of the tools you will need a flat chisel (chisel) and a hammer. If you want the tile to remain intact, an additional construction knife or joint for tile joints is required. Do not forget about dense trash bags.
How to dismantle tiles from walls and from the floor: step-by-step instructions
When the preparatory work is completed, we proceed to dismantle. We will describe how to remove the tiles from the walls yourself, because this process is more time-consuming in comparison with the removal of floor masonry, and requires precautionary measures.
The technique is the same both for dismantling the entire surface, and for removing individual tiles, if they need to be replaced.
Remove tile joints over the entire surface. To do this, use a knife or lining. If the grout does not lend itself, soak it with water, spraying it from the spray bottle. This is the most monotonous stage of work.
Tap the wall. By a muffled sound, you determine the voids - the place where the tile does not fit snugly. These are areas where several fragments can immediately fall off. Remember or mark them with molar tape so that the elements do not suddenly fall and injure you.
Start work from the upper left corner and move horizontally along the rows from top to bottom.
Insert the bit at a 45-degree angle between the tile and the wall and start gently tapping it with a hammer. If ordinary glue was applied, the fragment will easily come off, if cement mortar - you will have to make an effort.
In a similar way, remove all tiles and glue residue from the wall.
The same technology is used to remove the cladding from the floor, including porcelain stoneware. To clean the tile from the dry adhesive solution, soak it in warm soapy water for several hours.
If the integrity of the tile is not important, grout can not be removed and immediately proceed to the removal of the lining. Shards can be used for mosaic decoration. In this way, furniture is updated, a highlight is added to the interiors of the bathhouse, sauna or country house.
Dismantling ceramic tiles with a punch
If the room in which the repair takes place is small, hand tools are enough. But they are inappropriate to use in spacious bathrooms, dining rooms and halls. To remove the tile from a large area, use a perforator with a flat nozzle. This speeds up the process of removing the cladding 2-3 times, but there are several nuances that must be taken into account:
The hammer drill is not suitable for dismantling the cladding in areas where the wiring passes, behind batteries and in hard-to-reach places. To prevent electric shock, damage to the cable and pipes, use hand tools.
Tiles removed with a punch rarely remain intact. Theoretically, it is possible to remove it carefully: for this, first direct the tool not under the tile, but into the base, in order to make indentations of 2-3 equally distant places. Only after that pry the tile. The grooves compensate for the force of vibration, and there is a chance to remove the fragment without damaging it.
If there is not much dust when dismantling with a hammer and chisel, then when working with a hammer drill in a room it becomes very dusty. Be sure to buy a respirator to protect your airways from dirt.
How to prepare walls for laying tiles
When repairing with vertical bases, the same principle applies as when preparing horizontal ones: you need to level the surface and strengthen its adhesion. For this:
Level it with putty and beacons. The mixture will eliminate cracks and bumps. If the curvature of the walls is slight, one layer is enough. With significant deviations - two.
Treat the base with an antiseptic so that fungus does not form under the tile.
Coat the wall with a primer. For wet rooms, we recommend buying antiseptic solutions, for example, Eskaro Aquastop Professional.
Go to the facing.
To remove the old tile and prepare the surface for laying a new one with your own hands is quite realistic. Having the necessary tools and minimal repair skills, you can completely cope with this.This will save on the work of the master, and you can also restore the coating at any time in the event of chips or cracks.
No. 2. How to remove tiles without damaging adjacent tiles
Imagine that only one or two tiles cracked on the wall. Or you need to gain access to wiring, or other communications. Dismantling the entire tile would be foolish. But how to remove several elements without damaging adjacent tiles? The task is complicated by the fact that in the process of dismantling it will be necessary to try to preserve those elements that you remove. If the tile is old and you don’t have any spare samples, it will be difficult to find a suitable replacement in the store. Even if the collection is still being produced, there is no guarantee that the color matches. In general, this is without exaggeration jewelry.
- moisten the seams near the tiles that will need to be removed, as well as moisten the seams between them,
- wait a while, clean the seams, as described above,
- moisten the seams with soapy water and try to pry off the tiles with a spatula or chisel. Tapping with a hammer, the tile is carefully beaten off the surface,
- if the classic method didn’t work, you can use red-hot wirebent on both sides. The edges of the tile hook with hooks. Now it remains only to pull the wire with the tile on itself, applying force perpendicular to the wall. If you pull it at an angle, then the tile can be broken,
- when all the elements are in place, it can be very difficult to act - there is nowhere to catch, so you may have to sacrifice one element. They break it with a spatula and a hammer, or drill a hole in it with a drill. To replace a damaged tile (if there are no more tiles in your stores and stores) pick up a tile of the same size with a characteristic image. If you remove a few old tiles randomly in different places and put there elements with the image of coffee, dishes, palm trees, flowers or something else, it will turn out stylishly. It was as if it had been conceived! So there’s always a fallback,
- when cleaning the seams and trying to remove the tiles, be extremely careful not to damage adjacent tiles.
Whatever the dismantling of the tile may be, remember that even experienced craftsmen give no guarantee whether it will be possible to save it or not.
Recommendations for dismantling tiles from walls
1. Removing tiles from the walls is a rather complicated process that does not pass quickly. For its implementation, a lot of time and physical effort will be required, especially if further use of the tile is planned.
2. The main rule for the successful dismantling of tiles is to follow all technological operations to perform these works. A careless attitude to work leads to damage to the walls and complicates further work. Focus on work as much as possible.
3. A mandatory attribute of the work is the presence of a punch. With its help, the dismantling of tiles will be significantly accelerated. With its help, it is possible to calculate the impact force that is imposed on the wall.
4. Pay attention to difficult sections of walls, such as places where communication systems pass through. In this case, each hit must be pre-planned.
5. To remove one tile on the wall, if there is no need to dismantle other tiles, you should use special technology. Initially, use a spatula to remove the grout. Next, using an electric drill, make several holes around the perimeter of the tile. With their help, you can remove the tile without damaging the others.

6. Another option for removing tiles from the wall is to cut it in a diagonal direction. For these purposes, a glass cutter is used. Remove residual tile adhesive from the wall. Try to do this in such a way as to get a perfectly even base with a minimum of drops.
DIY ceiling tile removal
Before you get acquainted with the features of dismantling ceiling tiles, we suggest studying its varieties. In relation to the principle of manufacturing tiles for the ceiling, it happens:
- pressed
- injection
- extruded.
The first option is affordable and low quality. For the manufacture of such tiles, polystyrene blocks are used, which are stamped in a special way. This version of the tile is particularly fragile, since its thickness is only seven millimeters. This material is not resistant to moisture and is deformed under its influence.
The injection version of the ceiling tile has a regular and clear geometric shape and has excellent performance. In thickness, such a tile is slightly more than one centimeter. It perfectly retains heat and protects the room from extraneous sounds. This version of the tile is absolutely safe to use, but its cost is an order of magnitude higher than that of pressed products.

Extruded tiles have a perfectly smooth surface. This material is characterized by good performance, durability and high cost. There are many patterns and variations of this type of tile.
In relation to the type of surface, ceiling tiles are mirrored, laminated, solid. Its laminated version is resistant to moisture and has a diverse color palette. Such a tile can imitate any type of surface: wood, metal, glass, lining, etc. Seamless or solid tiles are easy to install and operate, the absence of seams between the plates increases the attractiveness of the ceiling. Mirror tiles are installed if there is a need for a visual expansion of the space, it differs in shape and type of mirror layer.
The method of dismantling tiles from the ceiling depends on the type of coating that needs to be removed. In the process, you will need:
- building mixture
- cellophane
- water,
- special composition with antibacterial properties.

In order to protect yourself from dust, a respirator is required. To protect furniture from dirt and damage, put cellophane on it.
Start dismantling from the corner sections of the ceiling. Initially, try removing the tiles with a spatula. If the tile is easily removed without additional tools, then feel free to use a spatula in the process of performing work. However, with partial peeling of the tiles, we recommend using a chisel and a hammer as well. They will significantly speed up the construction process.
If it is not possible to destroy the tile joints using the above tools, we recommend using a hammer drill or an electric drill. It is enough to drill a seam in several places. Also, with the help of these tools, the ceiling plinth is dismantled. When dismantling the baseboard, try not to damage the areas connecting the wall to the ceiling. If it is necessary to replace certain tiles on the ceiling, it is enough to destroy the tile joints along their perimeter with a spatula and dismantle the material.
After the dismantling of the old tile is completed, it is necessary to start preparing the surface for further finishing. Initially, the ceiling is cleaned of tile glue, use a spatula for these purposes. We recommend that you dampen the ceiling with plenty of water before starting work. In order to level the surface, use a grinder with a grinding wheel.

In order to perfectly align the ceiling, use sandpaper, which has increased rigidity. Next, the ceiling is painted or finished with putty. When arranging a false ceiling in a room, there is no need to carefully align it.
Please note that the obligatory process of preparing the ceiling for further work is its coating with an antiseptic primer. Thus, it will be possible to protect the coating from mold and fungus. Since the tile adheres tightly to the ceiling, air does not enter it; in such an environment, the fungus develops well. Therefore, only a cleaned ceiling is immediately treated with special tools.
Dismantling tiles from walls: general information and recommendations
The method of removing tiles from the walls depends primarily on the material with which it is fixed on the wall. We offer you to familiarize yourself with the basic methods of dismantling tiles:
1. If the tile was fixed using cement mortar, then we recommend using a hammer drill and a chisel to remove the tiles. At the same time, it will be difficult to remove the tile without damage.
2. If the tile was glued using tile glue, then in this case, it is likely to remove it without damage.
If there is a need to replace several damaged tiles, then in this case, you must perform the following steps:
- using a special scraper, remove grout around the tiles that will be removed,
- to loosen the tile, drill several holes in it with an electric drill,
- then you should pry the tile with a chisel and knock on it with a hammer, while trying to be as careful as possible, in order to avoid damage to adjacent tiles,
- after dismantling the tile, remove the adhesive or cement mortar.

The second option for dismantling the old bathroom tile is to remove all the tiles from the walls with its further use. This removal option is possible only if the tile was laid using an adhesive solution. In order to remove the tile, follow the instructions:
- initially grout all grout from the tile joints,
- then arm yourself with a chisel or spatula and place it under the tile, gently tap the spatula with a hammer,
- carefully remove the tile.
If it is necessary to dismantle the ceramic tile without preserving its integrity, then in this case, follow these steps:
- put on glasses and a mask, to protect your face from dust and dirt, lay a plastic wrap on the floor,
- using a hammer drill with a special nozzle in the form of a chisel, begin to remove the tile,
- Use a hammer to remove residual mortar.
Broken tiles can be used in the manufacture of garden paths in the country or to build mosaic decorations from it.

How to dismantle floor tiles
If the tile on the floor was laid on cement mortar, then its dismantling will go noisy and dusty. In the event that the tile is fixed with glue, it is possible to keep it intact.
In such a situation, the presence of:
Also, it is necessary to stock up with water, which will prevent the appearance of dust in the room. Initially, grout should be removed from the tile joints and the floor should be moistened with water. The greater the distance between the tiles, the easier it is to dismantle the material from the floor. Water will help dissolve the glue that holds the tile on the floor. After half an hour, get to work.
First, try to remove the tile with a spatula, which gently winds under it. If the tile does not go away, then also use a chisel. If necessary, add water to the floor, gradually removing the coating. The floor must be smooth and even before further finishing.
To clean the floor of glue, use a mechanical knife or sandpaper. This method of dismantling the tiles requires a fairly large amount of time and effort, but as a result it is possible to obtain a whole tile.

If time resources are limited, then in this case we recommend using a hammer drill. Please note that in this case, the tile will be damaged and dust will be present in the room.
Initially, all seams between the tiles are cleaned. Use water to remove grout. After that, take a punch and use the chisel nozzle to remove the tile from the floor. At the same time, carry out the work gradually, removing excess garbage in bags. Do not forget about the mask, respirator and gloves.
If it is necessary to replace several damaged tiles on the floor, it is necessary to initially cut the tile diagonally into two parts using a glass cutter. Next, the tile is carefully removed from the floor with a spatula or chisel. Try to carry out the work carefully, thinking through your every step, only in this case you will be able to achieve the desired result.
Number 3. The easiest way to remove old tiles
If the integrity of the tiles does not care, then you can significantly simplify and speed up the whole process. However, even if you originally planned to save at least part of the tile, and in the process it turned out that this is impossible, then this method will also be useful to you. Arm yourself with a hammer drill and follow this order of work:
- cover the floor with polyethylene, cardboard, plywood or polystyrene, if you do not plan to repair the flooring soon. Pieces of falling tiles can cause irreparable damage to the finish.
- communication pipes are also better protected, you can use the same plywood,
- don't forget to protect your eyes, hands and respiratory tract,
- the base under the tile must be strong (brick or concrete),
- punch tiles one at a time with a chisel nozzle, moving along horizontal rows and moving from top to bottom. The nozzle should be at an angle to the tile, as if to pry the cladding.
Number 4. How to remove tiles from drywall?
Many experts do not like to mess with the dismantling of tiles, but as soon as they hear that the tile is glued to drywall, they often refuse at all. The fact is that the glue literally eats into drywall, so that it can be removed with the tile. However, it is real to separate the tile from the wall. Only now no one can give an accurate forecast of how drywall will look after such an execution. Nobody undertakes to guarantee the integrity of at least some part of the tile.
If the tile was laid a few days ago, then removing it without much damage to the surface and the tile itself is still realistic. In other cases, you have to torment. The procedure is similar to the classic way:
- joint preparation
- First, you can dismantle one tile in the top row to make it convenient for you to work. A hammer and a spatula / chisel / chisel / chisel will come to the rescue - all, as described above,
- the remaining tiles are removed one after another with the same set of tools,
- do not be alarmed if the tile falls off with a piece of drywall,
- it is almost impossible to remove tile adhesive from drywall. If this is important, then gradually glue off the grinder, just work very carefully,
- when the work is completed, assess the damage
- if the partition has minor damage, then the pits and glue residues can be hidden under a layer of putty. After it dries, you can mount a new tile. If the tile was removed "with meat", then a complete replacement of the partition may be necessary. You have to be ready for this right away.
No. 5. How to remove tiles from the floor?
The process of dismantling floor tiles is not much different from the same process for wall decoration. It all depends on the need to maintain coverage:
- if the old tile is not needed, then act with a punch, prying one tile after another. If there is no tool, then use a chisel and a hammer, but it will be longer, and more forces will go,
- if you decide to try to keep the tilesthen proceed according to the classic method described above. First, the seams are wetted and cleaned, and then methodically each tile is poked with a thin spatula, which is hit with a hammer. Pull off and tap on all sides. As soon as in some place the sound became deaf, it means that the tile can be carefully separated from the surface.
Tile removal is a long and laborious process. The most annoying thing is that no one can guarantee the safety of the tile. So be prepared for everything, but hope for the best.