The question of how to paint the kitchen may seem difficult if you do not know about the technology of painting and what painting materials are better to use. Even if a professional painter will do the work, it will not hurt you to know about how to choose the color, paint and ornament. The result and the money spent depend on how savvy you are in this matter.
In the article we will talk in detail about how to paint the walls in the kitchen with your own hands.
What paint is suitable for the kitchen and why
How to paint the walls in the kitchen? The choice of paint is a responsible matter, since in the kitchen, air temperature and humidity often change.
Therefore, paint for the kitchen must meet certain requirements:
- resistance to steam and elevated temperature,
- simple purification from pollution (fat, stains from splashes of wine, tea, coffee, fruit juice),
- environmental friendliness
- lack of pungent odor,
- the presence of a variety of colors and shades.
Paints that meet these requirements are divided into:
The first place in the popularity ranking is occupied by water-dispersion emulsions. They are actively used in the interior, because they do not have a pungent odor, dry quickly and are safe for health. This type includes water-based, acrylic, latex and silicone types.
For kitchens with high humidity, a water-dispersive emulsion with latex or silicone in the composition is suitable. Such paint is able to fill small cracks and holes in the wall worse than plaster.
 Remember that washing walls with an aqueous emulsion coating is often not recommended - painting quickly erases, and ugly stains and streaks remain on the surfaces.
The glossy surface created by oil paints (alkyd enamel) is not afraid of wet cleaning. However, after using such paint, ventilate the room well: an unpleasant odor can remain in the kitchen for two months. All because in its composition there is alkyd varnish, and drying oil or turpentine acts as a diluent.
Oil paints are universal and can be applied to any surface, but dry from 12 hours to three days.
Silicate paint - type of paints and varnishes made of liquid glass. They provide excellent grip even without priming. This paint does not fade in the sun, is resistant to moisture and temperature extremes.
For reference. If you decide to prime the surface before applying this paint, use a silicate primer. Silicate paints also interact poorly with plastic and stone.
Foundation preparation
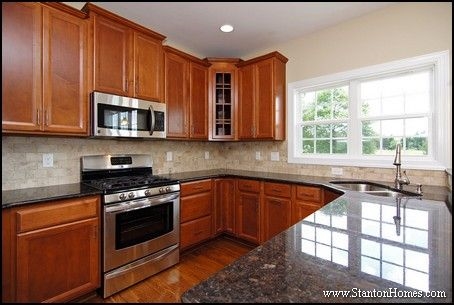
Painted walls in the interior of the kitchen will look fresh and stylish, if you approach the issue correctly. Before you start painting, prepare the surface of the walls, because the paint, even with the addition of latex and silicone, does not level the surface and does not mask the presence of ripples, large cracks and potholes.
The preparatory work includes:
- peeling of old layers of paint, wallpaper or crumbling plaster,
- primer,
- puttying
- wall finishing.
In many ways, the stages of work depend on the state of the wall itself. If the wallpaper was originally glued on the wall, clean it thoroughly without leaving a piece of wallpaper, since this piece can subsequently affect the quality of the painting. If the wall was previously painted with oil paint, and water-based paint is planned, get rid of all layers of oil paint, since the emulsion will not lie on it. Then strip with a spatula.

A wall previously painted with water-based paint is washed with a sponge dipped in warm water before it is painted with oil or silicate paint.. Pay particular attention to the previous plaster. If its layer crumbles and cracks from touching, it is better to remove the entire layer and plaster again.
It also happens that the plaster cracked in places, and along the entire wall it is held evenly and firmly. In this case, it is better to tap the entire wall area for the presence of "weak" places. They will give themselves out as a sound characteristic of voids. Having identified such defects, locally destroy them and putty back on.
After cleaning, prime the walls. For this, there are special compounds on mineral, alkyd, acrylic, quartz bases. Before use, dilute the primer with water (be sure to read the instructions) and apply to the wall with a paint roller. When priming areas under a window, in corners, near pipes, use a brush. After priming, the walls should dry well during the day.
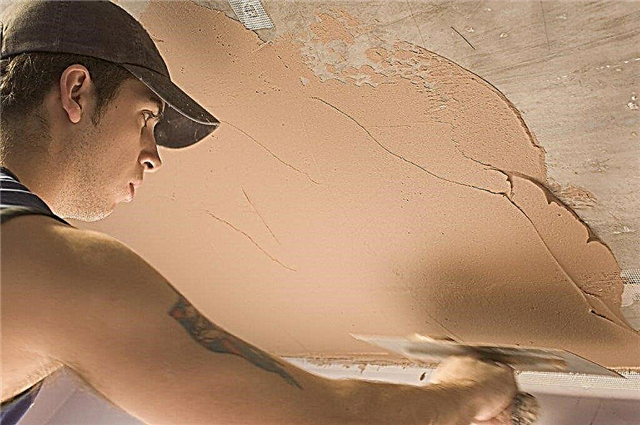
After priming, cover the wall with a layer of starting putty, using a spatula with a width of 35 to 45 cm. Sand the well-dried wall with a sanding block, mesh or sandpaper No. 60 or 80. Then cover the wall with finishing putty and also sand this layer after complete drying.
If desired, you can use a wire mesh to create a more solid and reliable foundation. In this case, a mesh is placed on the dry layer of putty, after which another layer of putty is laid on top. Following this, the grid is again laid, only already overlapping with respect to the first layer. All layers should dry well.
The final touch in preparing the walls for painting is the primer.
Attention! Grind the walls in a respirator, since the dust released as a result of the process settles in the respiratory system. After grinding, it is advisable to clean with a vacuum cleaner from gypsum dust and walls.
Emulsion, silicone or alkyd?

The final result of your work will depend not only on how you handle the roller, but also on the type and quality of the paint.
So, let's see what “water emulsions”, enamels and “silicones” are like.
Water emulsion

It is water-dispersed - perhaps the best option for the kitchen, which is very popular.
- practically odorless, harmless, easy to wash off from hands and tools,
- easy to apply with a uniform indelible layer,
- dries quickly enough (a couple of hours is enough),
- ordinary water is the solvent, not some smelly and harmful chemicals,
- ideal in terms of price - quality - ease of use,
- a huge range of color solutions: the entire "water emulsion" is sold in white, in which, after you select the desired shade, dye (pigment) is added and a special machine directly kneads the final color with you.

A conditional disadvantage can only be called the fact that water-based paint should be applied to an absolutely dry wall. Due to this nuance, repair periods may suffer.

Water emulsions come in two forms:
- Acrylic - make up 65% of the range of waterborne paints, universal, represented on the market by a large number of manufacturers,
- Latex analogues are more wear-resistant and durable than acrylic, but have a lower vapor permeability, that is, they can "accumulate" moisture.
Most often, this type is used for painting non-residential premises, and sometimes for exterior decoration.
Alkyd paints

Despite the lesser popularity, this type is often used for painting room walls.
- have a high rate of wear resistance, elasticity and strength (in comparison with the "water emulsion"),
- not afraid of temperature changes, humidity, direct water,
- tend to have a richer, more juicy color.
The downside is that:
- alkyd base, which has a persistent pungent smell and is fire hazardous,
- diluted with white spirit
- such paints are already sold in a certain color, so you are limited in choosing halftones.

All alkyd paints are divided into two types, depending on the type of base:
- pentaphthalic (marked on banks as PF),
- glyphthalic (GF marking).
In addition to the letter designation of the type of base, banks put a digital marking that indicates the category of enamel.
For example, the marking GF-230 means that this enamel is on a glyphtal basis, the number "2" means that it is intended only for coatings inside the house (walls, ceilings), 30 is the manufacturer's catalog number.

If the first digit in the marking is "0", then this is an alkyd primer.
Silicone
They appeared on our market relatively recently and have already firmly occupied their niche, thanks to such properties:
- excellent water resistance
- the best indicators for resistance to ultraviolet, burnout, coating,
- resistance to alkalis, which allows their application to the wall, which was plastered only a couple of days ago,
- almost odorless and absolutely not aggressive,
- like water-based analogues, pigmentation of any shade is possible.
Of the shortcomings, there is only one - the high price.
But, this is not surprising, all the qualities that they possess make this product worth its money.
There are cheap "analogues" of silicone paints called "silicone".
They are a composite, a mixture of silicone and acrylic bases. Here are a couple of examples.
This favorably affects the price of such a product, but for the worse affects its quality.
Therefore, we recommend that you definitely clarify this point in the store, especially if some model stands out in price among others.
We go for paint and tools

Before buying specific paints and tools, it’s advisable to consider a few of these practical tips:
- 1 Price matters. The cheaper the paint, the worse it is for certain indicators.
This has already been verified by experience of more than one person. The average cost of a liter of normal paint, as a rule, is 30-35 cu for 10 liters 2 Type of coating - glossy, silky-glossy or matte. You need to initially decide how much your wall will shine.

The first will shine too much, emphasize uneven areas, and on the third, every spot will be visible and they wash very poorly.
Therefore, as a rule, semi-gloss paints are chosen for the kitchen, glossy for the bathroom.

- If you can not decide between two shades of the same color, then ask the seller to knead them for you separately for 1 liter. in special containers. Every normal manufacturer has such a paid option.
- Paint two sheets of A3 paper (Whatman paper) in the shades of your choice, let them dry and see how they actually look in different corners of the kitchen and under different lighting conditions.
- Only after the final choice of shade can you buy the main batch.
- 4 If it is acrylic or silicone paint, then it’s safe to “not buy”. In the case of alkyd enamels, it is best to immediately take with a small margin from one batch.
The seller or a special paint consumption calculator on the manufacturer’s website will help you calculate the required volume. 5 Rollers. For painting walls, rollers 20-32 cm wide are ideal. The smoother the wall, the less pile is needed - an average of 8-12 mm.

Never buy foam (sponge) or velor models. This is a waste of money and you are tormented with them. You may also need the so-called radiator roller, which will help you paint over hard-to-reach areas behind batteries, furniture or in openings. 6 brushes. For water-based paints, brushes with synthetic nap are suitable, and for alkyd - only from natural.
Regarding the size, then take two - a width of 35 and 50 mm. They are useful for chipping butt joints or individual small areas (partitions, protrusions, racks).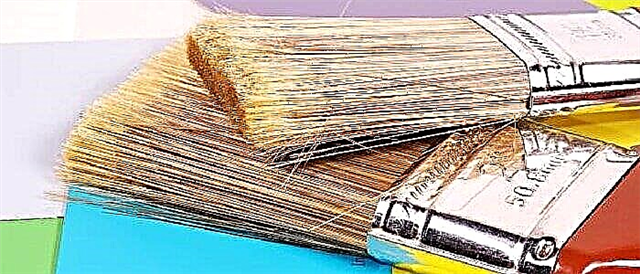
If you are going to paint large areas with a brush, then you need a brush 75 mm wide.


Padding
Primed walls before painting are highly recommended and here's why:
- adhesion is significantly improved, that is, the adhesion of the paint to the surface,
- the service life of the coating is increased,
- the effect of protecting the paint from excessive absorption of moisture by the surface,
- the paint lays down much better - more evenly and evenly,
- more economical paint consumption.
Priming occurs by impregnating the walls with a special solution. It is much thinner than any paint, its consistency resembles milk.
How to prime walls in a kitchen or any other room:
- 1, you first need to walk with minimal effort on the wall with a large spatula to finally remove small roughness from it, sticking sand and other particles after filling,

- 2 then pour the primer into the tray, soak it well, and then squeeze the roller a little,
- 3 start to apply the soil from top to bottom, gradually going from one edge of the wall to the other,

- 4 try not to leave drips. The primer, as mentioned above, is very liquid, so you need to immediately clean the visible smudges with a roller before its new “dipping”,
- 5 if you do not remove large streaks, they can create furrows in the putty and when painting it, believe me, it will not go unnoticed,
- 6 it is very important not to forget about the priming of inaccessible places: corners, joints and ledges. To do this, you need the usual wide brush,
- 7 at the end, wait 4-6 hours until the primer dries.


Tip: it is recommended to choose a primer of the same manufacturer whose paint you bought.
Just before painting

All professionals pay great attention to the preparatory work.
So, before you dip the roller into the paint tray and get down to business, make sure that:
- the surface of the walls is prepared, clean and dry enough
- You glued skirting boards, curtain rods, window slopes, switches, etc., with assembly tape,
- covered the floor, doors and furniture with construction film,
- if the matter drags on until evening, take care of sufficient artificial lighting,
- prepared brushes, rollers, tray, stepladder, a large damp cloth,
- spread the paint in the right proportion and volume (for the first layer).
Tip: it is advisable to rinse new brushes and rollers in warm water and wipe until barely wet. This will wash away factory garbage and unnecessary particles from them.
If everything is OK, let's get started.
Getting started painting

The main secret of excellent painting is painting the entire wall in one go.
Do not leave half a wall "for tomorrow" or even for a couple of hours. This is an iron rule.
To achieve maximum uniformity of the painted coating, the selected area should be painted in one go.
For a better visualization of the process of painting walls, we offer you a short video.
Based on this rule, you need to calculate your strength and time in advance.
A step-by-step guide on how to paint a wall in the kitchen:
- 1 The paint will need to be applied in two layers.
For the first, it can be diluted a little (5-10%) and mixed thoroughly.
For the second - dilute only on the recommendation of the manufacturer, otherwise, use the original consistency, after mixing well,
 4 Next, take a brush (50 mm) and paint in one layer the contours of this area: below - at the baseboard, above - at the cornice,

Aqueous emulsion paint (acrylic, silicone, latex) should be applied as follows:
- first make a few smooth W-shaped movements from the ceiling to the baseboard throughout the covered area,
- then move up and down with leisurely movements, evenly distributing the paint and densely covering the entire surface,
- try not to put too much pressure on the roller and get used so that at the end of the movement the roller does not rotate, as it can lead to paint splashing,
- There is also a “cellular” technique for applying water-based paints: the first layer is applied vertically, exclusively with down-up movements, and the second - horizontal.
- this will allow you to paint the walls with water-based paint without streaks,
Alkyd enamels apply a little longer and more difficult:
- the first layer is applied by brush with the retouching technique, i.e. quick swabs from side to side
- the second, already applied by the roller above the W-shaped or "cellular" method,
- Important: Before applying the next coat, make sure that the previous one is already dry.
Secrets and tricks of painting

As a bonus, here are a few more practical tips from experienced craftsmen:
- if you are painting for the first time in your life, then start with a plot that will be fully or partially lined with furniture in the future. It will be your training on cats, so to speak,
- for the most uniform layer, an average is required, closer to a weak effort on the brush or roller,

If you try to remove it after the paint has dried, then most likely you will have to peel it off, and you can peel off the paint with it to extend the life of your new or old roller tray, you can wrap it with food foil,


This will help you more carefully evaluate the results at each stage, see unevenly stained areas, streaks, joints and correct defects in time.
So that’s all. Remember that good paint and quality tools are half the battle.
What paint and why
Kitchen - a room in which there is a high probability of stains. Moreover, their nature can be very different. It can be spots of fat, any caustic substances, juices and sauces that have a bright color. Hence the main requirement when choosing a paint - it should wash well.
Special washable paints (Tikkurila Remontti Assa, Teknos Biora Balance), which create a dense film on the surface, are suitable for these requirements. These paints are made on the basis of latex or acrylic, they are an aqueous dispersion, that is, they almost do not smell. They can be washed with brushes, and some even with the use of abrasive substances (DULUX Realife, DULUX Diamond Matt, Tikkurila Luja 40, Johnstones Acrylic Eggshell).

Washable wall paint in the kitchen
Even better is the washing of walls covered with anti-vandal or persistent paints. They withstand several thousand cycles of brushing with detergents (Johnstones Acrylic Durable Matt, Johnstones Anti-Mold Acrylic, Teknos Timantti 40, Novatic Feste Farbe, Novatic Innenlatex matt).
A little about the type of surface that is obtained after painting the walls. Spots from glossy surfaces are best washed, and worst of all from matte surfaces. The matte surface is obtained due to the inhomogeneous, porous structure. A contaminant is clogged into these inhomogeneities and it is more difficult to wash it (there are rare exceptions - DULUX Diamond Matt). Therefore, on walls that will have to be washed often, it is better to use glossy, semi-gloss or at least semi-gloss compositions.
Color selection
It is not easy to decide what color to paint the walls in the kitchen. The choice of colors and shades is very wide, many companies offer to tint the composition on proprietary equipment in one of the RAL colors, and this is more than 200 shades. In addition, special shades can be created - metallic, sparkles can be added, etc. Given that painting the walls in the kitchen can be uneven - stripes, geometric and floral patterns, ornaments, paintings and any other methods of decorating walls, the number of options tends to infinity. However, first you need to choose the main color of the walls in the kitchen. When choosing a dominant color, there are two approaches:
- Paint the walls of the kitchen in a soft "background" color. This will create a calm atmosphere, which, if desired, is made more dynamic with the help of a kitchen set and accessories in bright colors.

Neutral painted walls for a relaxed atmosphere

Cheerful colors - for a bright mood
When choosing a color, it is worth remembering its influence on the emotional state of a person. Red is the color of danger, accelerates the work of all body systems. It is tiring for a long time in such a room. If you crave activity - you can choose it, or softer orange. If relaxation is needed, something more calm is required. For example, green color and its shades. It creates a calm atmosphere, and so as not to be so boring, you can add yellow. With it, green becomes more active.
Brown creates a sense of stability, but do not use too dark shades - it will be too gloomy. Black in its pure form suppresses, but as an “additive” to all windings makes the interior more dynamic. It is good in small doses.

Can't decide what color to paint the walls of the kitchen? Choose gray, white or beige - ideal for the bright fronts of kitchen sets
White, gray, beige - these are ideal “background” shades that allow you to highlight brighter interior items without overloading it. That is why painting the walls in the kitchen in these colors are used where the facades are decorated in rich colors.
Painting technology
The exact order in which the paint is applied depends on the type of binder and the base, and the effect you want is affected. But there are common points:
- Before starting work, remove the skirting boards, door trim, remove everything that is possible from the room.
- Cover all surfaces that may be dirty. This window, doors, an apron in the working area of the kitchen, floor. For windows, doors and an apron, it is easiest to use a plastic film glued with masking tape. This coating is easy to remove without leaving any residue. You can also lay polyethylene on the floor, or you can use old wallpapers, newspapers, etc. You can fix them using double-sided tape, preferably also masking tape (it does not leave traces of glue after peeling off).
- Paint is applied with a roller or brush. Usually two to three layers are required to obtain a uniform color. Each subsequent layer is applied after the previous one has dried. This time is indicated in the technical characteristics of the composition as "drying time on the stick."

Tools for painting walls in the kitchen

Painting the walls in the kitchen: paint is applied in a thin layer
When painting the walls in the kitchen is over, do not rush to test how well your chosen paint is washed. Read the instructions carefully first. Some of the compounds acquire their performance characteristics only a month after application. So do not rush.
All of the above is true for all types of paint - water-dispersed acrylic, latex. But, before starting work, carefully read the manufacturer's recommendations. If there are different recommendations, they must be followed.
Options for painting the walls of the kitchen - photo
Not so long ago, a third trend appeared - painting the walls in the kitchen in two colors. Companion colors are selected. It can be shades of one color - dark and light, can - contrasting or combined. If you want to choose different colors, use the designer color matching tables.
In any case, the most popular trend is painting one wall in a different color. This allows you to clearly indicate the accents. In the kitchen, this is usually a wall near which there is a dining table, but not necessarily.
Striped walls in the kitchen
Another option is to apply strips of a different color. More often - the stripes are vertical, which helps visually "raise" the ceiling. They are usually of different widths, located at different distances from each other, but this is far from the canon. The options are different. A few - in the figure below.

Wall painting options in two colors
If you do not want variegation, you can play with the texture of colors. The combination of strips of glossy and opaque paint of the same color gives a very interesting effect. It is like a combination of velvet and satin. It looks very interesting.
If the stripes are narrow, first paint the walls in a dominant color. After drying, stick strips of masking tape, which will serve as borders when stained in a different color. After the second shade completely covers the first, the adhesive tape is removed, they get clear boundaries without a “transition”.
Ornaments and Stencils
So that painting the walls in the kitchen is not boring, it can be revived with a pattern, ornament. The drawing is more difficult to cope with - you need professional skills, and applying ornaments to the walls can be easier than you think. Using stencils is a snap. They can be made independently from thick paper pasted with tape (to make it easier to cut and not tear), or you can buy ready-made ones cut on a dense plastic film.

Stencils - an easier way to decorate the walls for the kitchen
A suitable stencil is fixed to the wall. The easiest way to do this is with masking tape. Paint is applied using a regular sponge (you can use a kitchen sponge). They take a little paint on the sponge, distribute it evenly over the entire surface (a plastic plate is suitable as a palette). With this “tool” we paint over the wall in the slots. Since there is not much paint, it dries quickly.

Decorative painting of kitchen walls using stencils
If you want to get a two-color ornament, cover the parts that will be painted in a different color with tape (also masking). Apply the pattern in one color, wait until the paint dries. Seal these parts with tape and add the missing part with a different color.

To obtain a two-color pattern, cover part of the slots with tape
You can choose the right picture for the kitchen in the catalog of sites selling ready-made stencils. There are a lot of them in different styles. You will definitely find the one that you like more.
What is required?
- old kitchen
- screwdriver
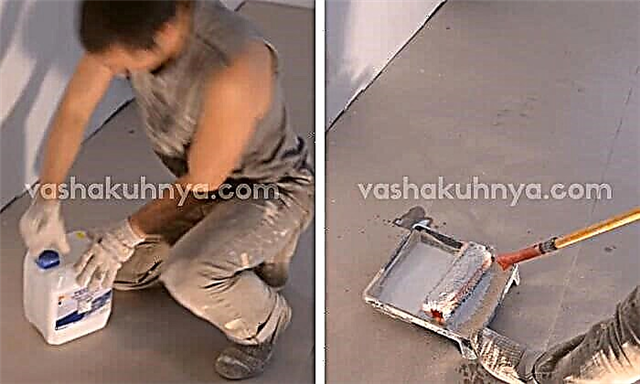
- degreaser (we used White Spirit)
- masking tape
- protective film
- gloves (we recommend vinyl ones - they are durable and do not interfere with maneuvers; they are sold in pharmacies)
- brushes (we have them 40 mm wide) - 3 pieces
- sandpaper with a grain of 100-180 microns
- alkyd soil - 0.9 liters *
- matte paint - 2–2.5 liters *
- matt polyurethane or acrylic lacquer 0.9–1 liter *
* As a rule, the consumption of materials is indicated by the manufacturer. The volumes of soil, paint and varnish are calculated based on the kitchen, as in the photo, or any other size of 3-4 linear meters.
So, we have a kitchen of interior aesthetics of the late nineties in color baked milk, which is not the most relevant today. Our task is to make the facades white and fit the kitchen into a modern classic interior.
We will repaint only the facades, the "insides" will leave the original. I will show the whole process on the example of one facade.
Types of paint for the kitchen
If the walls are painted in the kitchen, then it is necessary to use compositions intended only for internal work
An important requirement is a high level of water resistance coefficient. To paint the kitchen, you should choose the following types of paints:
- water dispersible
- latex
- alkyd,
- water emulsion.
There are also polyurethane, epoxy varieties of paint for painting walls in the kitchens. They allow you to create surfaces with an attractive appearance, easy to clean. The only limitation for buyers is a high level of value.
Water soluble
The low price made the waterborne paint the most common variety. The advantages of the material include:
- the ability to create your own color palette, just add the pigment of the appropriate shade and mix the main components with it,
- transfer of solvent function in ordinary water,
- simple application
- security,
- instant drying
- decorative paint does not emit unpleasant odors.
To carry out the work, it is enough to purchase a roller with a brush. Paint material is usually applied in just a couple of steps. The vertical direction is usually maintained for the last layer.
If the washable paint for the kitchen and its walls got on hands or on other surfaces, then it is easy to remove with ordinary warm water. The main thing is not to wait until the composition has dried completely. The selected materials in this regard do not play a role.
With latex base
The basis of production in this case is rubber of synthetic origin. The compositions contribute to the formation of a washable mat or durable glossy coating. The material can withstand even frequent exposure to active chemicals. They are often found in particles of detergents used in everyday life.
It also requires application in 2-3 layers. It is necessary to first dilute the composition with water, as described in the instructions. The first layer of water requires more than the next. A brush, spray or roller will become indispensable assistants in the application. And here you can not do without the expectations of the moment when the previous layer dries.
Before the second application, the composition can not be diluted if latex paint is used for the walls of the kitchen. The last layer is dried only with no drafts. Then there are no further stripes on the painted surface.
Water dispersion
They have the following advantages for the buyer:
- high coefficient of moisture resistance,
- indelibility,
- lack of smell
- environmental Safety.
Such materials can be used when performing work both indoors and outdoors. Especially relevant this option will be for rooms with high humidity, where you want to create a surface that is easy to clean.
How to choose for a spacious kitchen
For large rooms, choosing a color palette is slightly easier
Take into account your preferences and opportunities. Grayish gamma looks calm
However, it must be “bred” with the brightest colors. The main emphasis is on furniture.
Gray or light gray, combine striking elegance and simplicity.
In addition, it is worth listening to the recommendations.
- Do not use brown, especially saturated, in large quantities - it is depressing. Yellow-green can be used to decorate a separate part of the wall surface.
- Neutral shades are best suited for decoration - it will be comfortable and warm. You can apply any color palette, the main thing is that everything should be proportionate. Do not get involved in dark shades, as well as use a large number of cool tones.
Due to their restraint, such shades are a modern sign of good taste.
Which are suitable for a small kitchen
What color of walls to choose for the kitchen. To expand a small area, choose darkened neutral shades diluted with bright elements. It is better to add silver-pearl, beige, ivory to the milky color. The advantage of milky color is its perfect combination with almost all colors.
It will undoubtedly give the room additional volume, brightness and snow-white purity.
The azure palette visually increases the space, but additional colors are also needed here. Take, for example, such a combination - blue walls, white ceiling, light flooring, cool curtains. It is better if the wall covering is monophonic. You think to use saturated colors, for example, orange, red, it is better to decorate part of a wall or an apron with them.
Various shades of orange, such as pumpkin, amber or ocher, create a very warm, saturated, tonic and filled with positive energy interior.
The upbeat pistachio color using vertical directions, reflective surfaces will give a feeling of lightness. But it is worth knowing the measure. Light shades are most suitable.
It is important to choose the right furniture
Natural, natural and warm tone allows you to create amazing, sophisticated and attractive color combinations.
Dark colors are not recommended for wall decoration in a small kitchen. Apply only when decorating items or furniture.
Saturated violet colors will give the design elegant luxuriousness, vivid expressiveness and originality.
It is important! If the kitchen is small, there should be enough lighting
Water emulsion
The paint was developed recently. Consists of coloring elements and water. For the kitchen, it is recommended to choose a washable water-based paint. Thanks to this property, it will be possible to easily put facades and walls in order. The washable surface is easily cleaned, the most common kitchen contaminants are washed off easily: drops of fat, splashes from liquid food, and so on.
The surface painted with water-based paint is not damaged by the means used to wash the kitchen
It is important to carefully study the instructions for water emulsion materials, since not all of them are suitable for the kitchen
Features of painting the ceiling in the kitchen
In the kitchen, we cook, and constant cooking and exposure to temperatures strongly affect the room. The main influence goes to the ceiling, as all the heat rises up. When preparing the ceiling and painting, the following features should be considered:
- High humidity in the air. Cooking most often requires the use of fluid. The liquid evaporates and the humidity rises. Moisture rises to the ceiling and interacts with it.
- Change in temperature. A stove can heat the ceiling to 50 degrees Celsius, and cool an open window in winter to 0. The stove is turned on daily in the kitchen, which heats the room, then the room is ventilated.
- Accumulation of fat and soot. Spray often flies from the stove, which can reach the ceiling.
- High probability of flooding. In classic houses, kitchens are located under each other, because it is more convenient to carry out water supply there. Malfunctions of the water supply system can lead to flooding of the neighbors from below.
Due to the high humidity, the paint for the ceiling in the kitchen must have high moisture resistance.
Paints for the kitchen and their pros and cons
There are a lot of types of colors and nuances of their differences, but only a few are suitable for painting kitchen walls.
- Water dispersion and water emulsion (acrylic, latex) - an excellent and most popular type of paints for the kitchen.
Pros: they form an almost indelible layer, “grab” well with the base, are easily applied, mask cracks up to 2 mm and dry quickly - room operation is possible only two hours after application. In addition, in the process, you can dilute with water in certain proportions, and not with a diluent. And one more advantage of it is that they are sold in white so that you can use the tinting to get exactly the shade that you need. Simply put, you can choose from 100,000 color shades.
Cons: they are applied only to the dried wall, that is, the plaster should dry for 3 weeks before painting (!). Another disadvantage is the relatively high price.
What is better for kitchen walls - acrylic or latex paints?
- Acrylics are ideal for decorating the kitchen - they are well washed, beautiful, vapor permeable and quite durable, but their durability is slightly lower than that of latex paints.
- Latex paints are more suitable for wallpaper for painting even if you have priority on durability and durability. But keep in mind that they lose to acrylic material in vapor permeability, which means that they contribute to the formation of high humidity.
Pros: more durable (than acrylic and latex paints), immune to temperature changes, high humidity and other aggressive influences, withstand shifts of partitions. Such paints have a bright color, are very easy to apply, characterized by low consumption, as well as light and moisture resistance, and also practically do not shrink when dried.
Cons: alkyd paints are based on a solvent, which means they can not be called environmentally friendly and fireproof.
- Silicone paints (SK) are ideal for painting walls in the kitchen, since they have all the advantages of all the materials listed above, they can be painted with unpainted plastered surfaces, but at the same time they have absolutely no drawbacks ... Perhaps, except for the price, due to which SK are not very popular.
Concrete
Concrete surface painting is the simplest and most affordable option for decorating a wall from this material. Before painting, concrete is thoroughly washed with dust and dirt. This is necessary because contamination reduces the life of the paintwork. Well cleans the surface of the soap solution using a rough brush or rags.
It is important to choose the right finishing method and color scheme. If rust is present, it should also be removed using copper sulfate solution.
The final stage is the sealing of cracks and cracks with putty. It is important that the concrete surface is completely dry before painting after using sealant and primer.
If there is rust, it should also be removed using a solution of copper sulfate. The final stage - sealing cracks and cracks with putty
It is important that the concrete surface is completely dry before painting after using sealant and primer.
Tree
Decorative decoration of wooden walls involves the use of many types of paints and varnishes, since most of them fit well on wood. Preference should be given to those colors that allow the tree to breathe. Most suitable are non-toxic acrylic paints based on water and acrylate resins, as well as water based emulsion. It is steamproof, does not clog the pores of a log made of wood.
Often, residents of a house want to make the living room special, so they resort to ways to change its functionality.
Important! Interior painting of a house or apartment should be carried out with environmentally friendly and healthy compounds
Brick
Most often, a brick wall is painted a few months after the construction. Working with fresh masonry can lead to the formation of defects. The peculiarity of the material is that its uneven surface and porous structure do not allow easy removal of the old coating.
Having designed each zone in a specific color scheme, you can visually divide the space, and at the same time not create physical obstacles.
Over time, the base hue changes its original color. The best option for bricks is silicone based paint. Despite the high cost, it does not interfere with air circulation and hides small defects.
Before starting work, the brick is cleaned and washed with water. A few days later (at least 7) after the release of all moisture, the primer and surface painting begin.
Paints and varnishes for wallpaper are divided into three groups: acrylic, water-based and latex. Any kind of paint is suitable for paper wallpapers, acrylic for vinyl. Latex composition fits well on non-woven and cullet walls.
Painting the walls in the interior makes the room not only attractive, but also creative with a wide range of decorative techniques.
The options for painting the wallpaper for the room in two colors can be evaluated in different photos. Among them: highlighting only one wall with a different color, horizontal and vertical separation, inserts, art stripes, geometry, alternating gradient tones.
Plaster
For plastered walls, epoxy and polyurethane paints that do not require special preparation of walls are an excellent solution. They protect the surface well, better fix the plaster. The best option is emulsion paint. Its pigment penetrates well into the pores of the finishing layer, firmly fixing.
The ideas for wall decoration are not limited to monophonic painting, structural paint and other options for the original decor will create a beautiful interior.
What paint to paint the walls in the kitchen
Deciding which composition is ideal and how to apply it, choosing a color and texture are the most important questions that every housewife who starts repairing in the kitchen is asked.
 Choice of texture and color of paint for the kitchen.
All surfaces in the kitchen like walls, tiles, furniture and floors should be easy to clean from dirt, not afraid of wet cleaning and temperature extremes, be resistant to mold and mildew, and at the same time look attractive. A good mood for the whole day is provided if you have breakfast in the perfect kitchen.
The advantages of paintwork
Designers have been using paintwork materials for quite some time now, instead of standard wallpaper, tiles or panels.
Why is paint preferable for decorating kitchen walls? This question is easy to answer. The widest palette and the ability to mix tones allows you to choose absolutely any shade. Practicality, low cost, ease of care and application make coatings indispensable for designers. Mistresses appreciate them for their excellent moisture resistance, wear resistance, resistance to various mechanical influences and ease of changing the interior.
Color selection
To decide how to paint the walls in the kitchen, it is important to understand why the room will be used more often and what mood it should convey.
For example, Red color in the interior increases appetite and pressure level, and also causes discomfort when staying in such a room for a long time. Designers carefully use this color when decorating kitchens.
 Kitchen design with red walls.
Orange tint raises the mood and improves vigor, but in excessive amounts it can irritate the optic nerves.
 Kitchen design in warm shades, orange color of the walls.
If you often have family dinners or tea parties, then yellow in the interior - your assistant. It calms and establishes the digestive tract. A dark green, purple and gray colors reduce appetite. Pure white causes association with the hospital, and blue color - hides the space.
It is not necessary to paint the walls with any one paint. You can select a cooking zone or separate a dining group, draw stripes or geometric shapes on the surface.
 Separating kitchen areas with color.
The color scheme should be in harmony with the kitchen set and your mood, that is, it should fit into the design of the kitchen. In the end, the walls in the kitchen can be repainted over time. This is not as important as choosing the color of the walls in the children's room.
Types of compounds
Manufacturers suggest when painting walls to use:
- Water based paintsrelated to the variety of water dispersible compositions. They are characterized by the absence of smell, environmental friendliness, the ability to quickly dry and “breathe”. The stains that have fallen on the kitchen wall painted with such a composition are easy to clean with an ordinary rag.
- Alkyd - They smell bad, do not “breathe”, dry out very quickly, do not crack and have a high degree of elasticity. They are highly flammable.
- Acrylate - One of the most expensive paint options. It is a mixture of acrylic and latex compounds, characterized by wear resistance and durability. It does not fade in the sun and does not deform.
- Silicone - relatively recently appeared on the market, are quite expensive and are used for painting plastered textured walls. This is a new generation composition that meets all the requirements for interior paints.
- Latex - do not let moisture in, dry quickly, forming a protective crystalline film on the surface. They belong to the class of washable interior paints, which are not afraid of chemical detergents.
- Acrylic paints for the kitchen are distinguished by the widest color palette, do not smell and dry quickly. When applied to the surface, a special film is formed that protects the painted wall from abrasion. The color is bright, with a pleasant matte and silky texture.
 Painted walls in the kitchen with water-based paint.
  Wall painting in the kitchen, acrylic paint.
Some brands offer a variety of decorative compositions that differ in texture, metallic tint or the ability to be highlighted in the dark. Some types of dyes imitate the texture of brick or wood. Such paints are environmentally friendly, easy to clean, do not absorb dust and are characterized by a high level of wear resistance.
 Textured wall painting in the kitchen with paint.
The assortment of almost any hardware store includes glossy, matte and semi-gloss paintwork materials. Painting the walls of the kitchen with glossy compositions should be carried out on a perfectly flat surface without roughness or dents. Any defect will be striking. It is worth remembering that the reflective surface visually increases the room and hides small spots of dirt. But on the matte, on the contrary, any spot will be perfectly visible.
 Glossy paint for painting walls in the kitchen.
Painting the walls in the kitchen should be carried out with a composition having high moisture resistance and wear resistance. The kitchen is a real military training ground for dyes: temperature changes, condensation, grease flying during cooking, and dirt stains. If the painted wall cannot be cleaned of debris and dust, then such a surface will quickly become worthless. The composition should contain elements that prevent the appearance of fungus and mold.
 Kitchen design in ethnic style.
It should be convenient to work with paint. For this, such a parameter as hiding power is responsible. Composition and distinguishing characteristics are always indicated on the packaging.
Washable paint selection
What paint to paint the walls in the kitchen, everyone decides for himself. Water based paints are great for this. You can also use any polymer compositions, with the exception of dyes based on PVA. This paint is not resistant to moisture and is suitable only for dry surfaces.
 Walls in the kitchen, painted, washable with paint.
Silicone, latex and acrylic paints for the kitchen are also very popular due to their properties and cost. Do not save on the choice of paint. Make the right choice of paint for walls, the duration of operation of the entire room depends on its quality and characteristics.
How to prepare walls for painting
Kitchen walls should be painted on a perfectly smooth and even surface. To begin with, you need to remove all stains, traces of dirt and grease, soot, old wallpaper, tiles and other materials. Crumbling plaster must also be removed.
Fungus and mold, if present, are removed mechanically. The surface, in this place, is treated with special antibacterial compounds. Potholes are covered with stucco on a cement or gypsum basis.
 Application of paint on decorative putty to decorate the kitchen.
The walls are leveled using plaster or moisture-resistant acrylic putty, applied in two or three layers. To increase the adhesive properties, a primer is applied after each coat.
A deep penetration primer is preferred. It is not expensive and can be diluted with water 1: 1
It is recommended to choose a moisture-resistant putty of the same company as the paint, because their compatibility will depend on how long the paint will dry, the appearance and strength of the coating, resistance to various damage and resistance to wet cleaning.
 Creating a design in the kitchen with your own hands, painting the walls.
To obtain an ideal surface, the dried final layer must be treated with a sandpaper.
Security
When carrying out paintwork with your own hands, you need to follow the simplest rules:
- Be sure to wear safety glasses and rubber gloves to prevent the dye from getting on the skin and mucous membranes. Hair is hidden under a hat.
- Use only working, stable stairs and supports.
- The air in the room should penetrate unhindered all the time. But do not allow the formation of drafts.
Painting walls in the kitchen with your own hands is a difficult but very interesting process. The final result directly depends on your efforts and patience.
Conclusion
Painting the walls in the kitchen is one of the best solutions in creating an environmentally friendly interior. The main thing is to choose the right paint: breathable, moisture resistant and non-toxic.
Knowing the process of preparing the walls for painting, you can paint the kitchen yourself. Having connected imagination and armed with a stencil, it is easy to transform the kitchen into a cozy corner - the main thing is to navigate the basic laws of creating interiors.