Laying tiles always required finding a good specialist. The finished result was often not pleasing: one mismatch of fragments along the crosshair led to a deterioration in the appearance of the entire lining. However, modern technology has reached a new level.
Today it’s not at all necessary to turn to the tiler for help: there is a DLS system. Consider its features and the essence of technology based on a brief overview.
Features
The DLS-system for laying tiles is a special auxiliary elements, through which it is possible to perform masonry work no worse than a specialist.
The standard kit includes:
- tile wedges,
- wedge bases,
- special clamp.

Outwardly they look quite simple, the principle of use is understandable and does not cause difficulties when creating a high-quality tile coating. This system eliminates the fitting of tiles "by eye".
The bases and wedges are made of impact-resistant plastic. Products of individual manufacturing companies can be made of metal alloy. Such varieties are reusable.

Each small rectangular base is suitable for a specific wedge-clothespin. The number of clips used is the same as the number of bases.
The clamp is designed to fix the wedges with the basics. Outwardly, it resembles thin curved ticks, although the modification of each brand can have a separate look.
Advantages and disadvantages
Despite the apparent simplicity of the DLS-laying system has a lot of advantages.
Denote the main:
- She successfully replaces the classic crosses for tiles. At the same time, it is more reliable and provides the best cladding result.
- Her purchase will not hit your pocket. You can buy it at hardware stores at an affordable cost.
- With its help everyone can put a tile. This will save on the call of the master (the cost of facing is from 1000 rubles per sq. M).
- It facilitates the workflow. You do not have to constantly adjust the tile and adjust it in the event of a shift.
- It is suitable for working with horizontal, vertical and inclined surface types. In this case, the result will be 100% good.
- DLS-laying system reduces the time for laying tiles by about 4 times, even if it is a vertical base.


- You can use it with absolutely any tile material. She proved herself to be excellent in working with large-sized tiles (for example, 60x60, 70x70 cm).
- Auxiliary elements can be used several times. Due to the strength they are not deformed. If you need to finish several rooms with tiles, you do not need to buy new components.
- Tiling with DLS is more accurate. Usually in this case there is less garbage and an excess of glue.
- For such a system, the thickness of the adhesive does not matter. It eliminates the displacement of fragments, as well as their subsidence when the tile adhesive dries.


In essence, a DLS system is needed to maintain perfect accuracy between tiles. It doesn’t matter if you use the floor or wall version.
DLS has several drawbacks.
Note them:
- She is not autonomous. You will have to create the necessary connections between the tiles yourself.
- It does not exempt from the need to prepare the foundation. If you do not pay attention to the difference in height, its use will not give the desired result. With each new tile, skew may be more noticeable.
- You can use the elements of the system in question until the glue sets. Otherwise, it can reduce its adhesion and durability of the coating.


Styling technology
A DLS system can be used in three different ways:
- "minus" (work with identical tiles),
- the letter "T" (facing the surface with two different tiles),
- "a plus" (simultaneous fixation of 4 elements at once).


In fact, these are layouts in the form of a chessboard, offset and brickwork. Typically, up to 100 pieces of warp and wedges may be needed to carry out work. A DLS system for leveling tiles is used when tile adhesive is applied to the base.
Consider a step-by-step technology based on the plus methodology:
- Take the base, push the tongue. Turn it at right angles to the main part. This should result in a part with a wall having a square cutout and two identical base parts. In the middle of each there is a center mark: this way the marking is skewed.
- The base is placed under the tile, located between two fragments. In this case, one side of the base is pushed all the way.
- Two more tiles are laid on the second base. It turns out that the base is located in a crosshair of 4 tiles. Tiles are laid tightly, pressing against each other as much as possible.
- Ribbed wedges are inserted into the square hole. Try to do it tightly. Due to the wedge, which is visually wider than standard plastic ones, it is possible to remove the height difference between the next stacked tile fragments.
- For the same density use a special clamp. It will allow fixing the wedges at the base until the tile dries.
- After fixing the DLS system, the tiles are not touched, the wedges do not move and do not change their position.

Drying time depends on the type of glue used, the size and thickness of the tile, as well as the temperature regime. Usually it takes at least 24 hours to dry.
After the glue has dried, the DLS system is removed. Typically, the base wall thickness is 1.5 mm. When performing trowelling, the seam can be from 2 to 2.5 mm. It depends on the terrain used tiles and skills of the master.
Note a nuance: the plus system is not the only method of laying tiles in the traditional way. Its constituent elements can be laid between tiles not only in the crosshairs. At the same time, the accuracy of the finished work will not decrease. Moreover, do not forget about the corners. They can also be “squeezed” by the DLS system. To do this, it is not necessary to press the tile from two sides: one edge is enough.

How to choose?
Among the offers of different brands it is easy to get confused. Customers are also worried by the fact that such a system looks different for different manufacturers. For example, the shade of the wedges with which the bases are attached can vary. More often it is a white base and a black wedge slide.
In order to buy high-quality auxiliary material, which ensures an impeccable result in the future, do not give up the golden rules of choice:
- A good wedge is always ribbed. If you see a wedge bifurcated at the ends, and the shape of the base is not similar to that described, this is not a DLS system. Look at the photo, so as not to fall for the trick of an unscrupulous seller.
- Such systems are economical. They do not need to be shoved from 4 sides to get the perfect result: just 1 mount in the center is enough. Do not take excess.
- Look at the plastic. Any deviation from the norm: curved edges, visual defects - speak of marriage and low quality. With this material you can not count on professional cladding.
- Do not buy supplies in a dubious store. Contact a reputable retailer with a good reputation. Feel free to ask the seller for product documentation. A company that respects its reputation provides documents for each type of product.
SVP - tile alignment system
 It should be noted that the new alignment system is not autonomous and does not lay tiles on its own. It must be regarded as a very suitable, greatly facilitating the work of an additional device that eliminates the fitting of the products "by eye" and carries out the cladding of both vertical and horizontal planes as accurately and efficiently as possible.
Particularly recommended is the use of such a system when laying large-format plates (for example, from porcelain stoneware, 50 × 50, 60 × 60 or more).
The composition of the SVP includes only 2 useful componentsmade from strong, impact-resistant plastic (some reusable components of expensive systems are made of durable alloy) - clamp and clothespin. The number of wedges and clamps depends on the laying area and the size of the tile fragments. The cost of such a system is quite small, and the result of its application is surprising: practically no, even small differences between the tiles with the correct use of the system will not appear. As auxiliary equipment, special wedge tongs, similar to non-thick curved tongs, will be required.
Using wedges for styling
 In addition to reusability, the device also has a multitasking function. The cost of wedges is low, but the performance is impressive. With this device, extremely parallel tile lines are reached, which means that smooth and neat seams are acquired. The equalizer is applied on the most non-standard sites. The device makes it possible to choose the desired thickness and acquire a uniform seam on the upper part of the mosaic tile.
Among the positive aspects of ceramic wedges It is worth noting the low cost and effectiveness. Wedges are represented by universal assistants during wall cladding with stone. In cases where there is a significant difference in the size of the tiles, the wedges are inserted in the places where the seam should be located to create an even line. There are many points when plastic products help out functionally. But, like every system, there are positive and negative sides.
The principle of work with the system
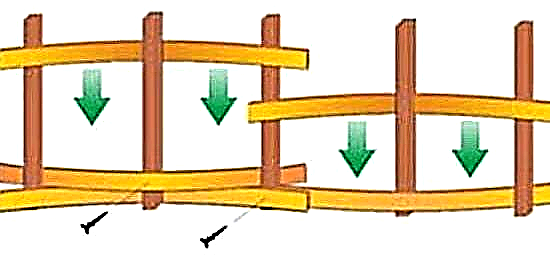
 The basic principles of working with the system is as follows: between 3–3 tiles (depending on the size of the tile), clamps with a direct base are placed in the lower section of the tile, in each of which a parallel tightening wedge is fixed, tightly pressing down the tile planes. The laying plane must be pre-prepared and leveled, and the load provided by the grasp eliminates the subsidence and shrinkage of the planes when the glue dries, displacement relative to each other, or sliding tiles.
Clips are put in a certain way: the installation of one main point in each tile section with an indent of 5-6 cm is considered a suitable option for their position. When the length of the side of the tile fragment is longer than one meter, it is recommended that the control clip be installed in the central part of the tile edge.
A day or two after the glue dries, the clamps and wedges are removed by directed blows of a special rubber hammer along the seam or by another convenient method. The graceful leg of the clamp breaks, and the base remains under the laid tile, reusable wedges are used for further work (in high-quality systems, the use of tightening components can be up to 50 times).
SVP is actually a multi-purpose system, which is suitable for both floors and walls, while the work can be with tiles 6-12 mm thick.
DLS Alignment System Feature
Sometimes masters have problems about the differences and advantages of using alignment systems - DLS and SVP. They are as follows:
 the dimensions of the clamps and wedges of the DLS system are significantly different from the clamps and wedges of the SVP - DLS massiveness, an additional stiffening rib in the lower part of the wedge and a considerable footprint provide the best load on the tiles, not allowing them to “walk” about each other. This feature is not so visible on small-format tiles, but in large-format details, it will undoubtedly play a good service. The reviews of specialists on special websites suggest that thin SVP wedges on large tiles are ready to bend, and the edges are raised and not smoothed in the plane,
- DLS is a complete system of wedges, special clamps and tongs, while low-cost solutions of SVPs require only a fixed number of wedges and clamps. The formation of the system affects its price. With the same number of wedges and clamps, DLS usually costs more than SVPs,
 the thickness of the DLS clip, despite its apparent bulkiness, is thinner than that of the SVP and is about 1.5 mm versus 2 mm: this also affects the thickness of the joints between the tiles,
- the DLS clamping device makes it possible to work with tiles of different thicknesses - from 3 to 20 mm,
- the DLS clamp foot contains a folding system: this can play a role if the specialist leaves part of the work in progress the next day - accidentally hitting and breaking the SVP leg, it can be very difficult to get the old base from under the tile in order to determine another component. In the case of DLS, this will not happen - the clamp leg simply folds, but does not break off at the base.
 the dimensions of the clamps and wedges of the DLS system are significantly different from the clamps and wedges of the SVP - DLS massiveness, an additional stiffening rib in the lower part of the wedge and a considerable footprint provide the best load on the tiles, not allowing them to “walk” about each other. This feature is not so visible on small-format tiles, but in large-format details, it will undoubtedly play a good service. The reviews of specialists on special websites suggest that thin SVP wedges on large tiles are ready to bend, and the edges are raised and not smoothed in the plane,
 the thickness of the DLS clip, despite its apparent bulkiness, is thinner than that of the SVP and is about 1.5 mm versus 2 mm: this also affects the thickness of the joints between the tiles,
Tile Installation Instructions
 Like that the lesson will require vigilance and accuracy during operations. Conventionally, the procedure is divided into 2 stages - preparation and calculation itself.
Preparation for work begins with the removal of the previous coating, its leveling and then ends with the priming stage. Next, you can switch directly to styling. If necessary, it is allowed to lay an infrared or water heated floor under the tile.
It is also necessary to buy certain appliances, such as:
- Putty knife,
- Glue,
- Special marker and others required in the work.
 There are several alternatives to laying tiles: seam in seam, diagonal, dressing. The desired result can only be achieved by aligning the plane well.. In the second step, the main point is the location of the plank on the wall with fasteners. This will help lay out the main tiled row.
Before sticking the first tile, the calculation is performed and the corner is fixed, leading in the future to laying. After the angle is determined from which the lining will begin. The tile must be pressed equally on the entire plane, all the released excess glue must be removed. On the second corner, you may need to trim the tiles. After the glue has completely dried, all excess elements are removed, and the seams are overwritten.
 With the improvement of technologies for the production of facing materials, the quality of ceramic tiles produced also increases. At the same time, the high-quality performance of floor and wall cladding increases the impression of spectacular ceramics, so the requirements for finishing are constantly increasing, which is the reason for the appearance of fundamentally new and improved tools, instruments and devices used in facing works. One of such devices is a set of SVP clips, designed to simplify the laying of ceramics when facing the bases, improve the quality of work and reduce time costs.
Types of fixtures
The floor leveling system when laying tiles is, of course, not presented in a single copy, respectively, there are several types of it:
- The first option is economical (SVP DLS). In this case, the product is a base, the fastening of which is carried out by a wedge. This view allows you to fix and align the tile, let us use it on a surface that does not have significant uneven areas.
- The second option (Litolevel tile alignment system), which is more expensive, is a curved shape system. In turn, it is this feature that gives it uniqueness.Thus, the device adapts to the individual structure of the tile and surface, after which it evens out the coating evenly distributing the glue.
 Different systems
The main thing is not to think that such a design will help to do all the work of laying and distributing glue, this is far from the case. Any kind, whether it is a dls or litolevel leveling system, is just an additional assistant that can only eliminate some of the shortcomings, but does not do the work for you.
In addition, the material to be used becomes an important factor. Since the quality of the tile and the adhesive mixture plays a special role.

Application
Now it is worth considering the use of such devices. The use technology itself is quite simple, but still you need to familiarize yourself with it, understand and practice it.
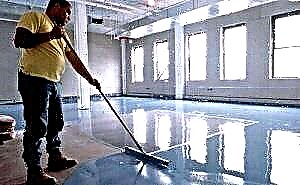
- Initially, a glue mixture is applied to the surface, previously cleaned and prepared. After which it is distributed with a notched trowel in the required area.
- Next, the first tile is laid, and leveled, in order to set the main level to the remaining elements.
- The next step, depending on the device used, is the following: if a tile alignment system with a clamp is used, then they are installed at the edges, i.e. two clamps are installed on each side at a distance of 50 millimeters from the edge. When using a more expensive option, the elements are installed at the intersection of four tiles.
- In any of the cases, the installation itself is carried out as follows: we bend the thrust area of the clamp and start under the bottom of the tile so that only the tail with the hole in which the wedge is inserted protrudes from the seam.

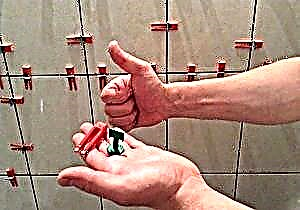
- The wedge itself starts up to a full fixation, for which it is desirable to use special pliers, since it is not very convenient to carry out such work with your hands
- Note that the place of fixation must be left clean, and make sure that the adhesive mixture does not fall on the device itself.
- In this case, all excess mixture must be instantly removed.
- Thus, it is necessary to lay all the tiles in turn until the surface is completely covered. At the same time, the floor leveling system clamp remains in the tile until the adhesive mixture dries.
- After completion of work it is necessary to remove wedges, and cut off the lower part as much as possible. Those. as you understand it remains under the tile, but the top must be removed.

It should be noted that without fail the entire masonry is carried out according to the level, and each laid tile is checked. Thus, it is possible to achieve maximum quality of work performed. After which grouting is carried out.
 Special pliers allow you to speed up the DLS mount system
Conclusion
Despite the fact that the fastening of the DLS tile is more convenient to use, but the cost is more expensive than the SVP, the master already has the right to choose it, and both systems perform their work.
So, we examined what SVP is, its advantages and disadvantages, as well as the method of application. Now you have only the decision to use such a system at home, when performing work, or not. We hope that the information provided will be enough for you to make a decision. We also offer to watch a video in which it is visually examined, how tiles are laid using SVP and DLS. If you still have any questions on this topic, do not be shy, write in the comments, and our experts will answer them.
Working method
DLS makes tile installation much easier. It allows you to evenly lay out tiles even in the most difficult conditions, without taking into account the screed and the amount of glue. When using DLS, there will not be such a major problem as displacement of parts during operation. You can also not worry about subsidence tiles. The DLS system reduces laying time by half, which is extremely important when working with large areas.
Before work, it is necessary to check the evenness of the coating itself. If you deal with this before installation, there will be no problems in the installation process itself. Three tile laying techniques are known when DLS can and should be used:
- fixing one tile - the minus method,
- fixing two tiles - method "T",
- fixing four tiles - the plus method.

A DLS system consists of several structural elements. These include plastic inserts in an amount of at least a hundred pieces and wedges, the number of which should coincide with the number of inserts. They are threaded into inserts, which are aligned using a special clamp. The clamp is the main tool.
The first step before installing the tile is to apply the adhesive to the surface on which it will be laid. This is followed by the installation itself. It is important to lay the first tile correctly. To do this, you must use the level. The evenness of the entire surface will depend on the position of the first tile.
Fix all the elements with inserts, wedges are inserted into them. A clamp is then used to make the entire surface even. When the glue dries and the tile solidifies, it is necessary to remove all inserts with wedges. If any wedges are stuck, you can carefully knock them out with a hammer. Using a DLS system is almost always justified.
It is especially convenient to use it when working with large tiles (for example, 70x70 cm). On tiles of a larger area, distortions are not immediately noticeable even to a professional, especially a beginner.
Pros and cons of the system
Making a tile absolutely even is the dream of every builder, and the DLS system makes this dream much closer. Consider the pros:
- DLS allows you to work with floor and wall tiles. For wall plates, the principle is as follows: first make the bottom row even, then the entire surface is leveled from it.
- This system saves time. The process is carried out twice, or even four times faster.
- The uniform position of the mortar under the tile. This eliminates bumps during installation.
- You can install in a specific position each individual element.
- Wedges can be used more than once. The same applies to clamps.

- After work, little trash remains.
- Anyone can work with DLS, for this it is not necessary to be a professional.
- Lack of work with crosses, as with conventional technology.
- When using the DLS system, no seams are formed. This avoids malfunctioning or shifting of the tiles during installation.

However, there are also negative aspects of the DLS system:
- The high price of component parts sometimes forces you to turn to familiar technology.
- Tile adjustment must be done in time while the glue is dry.


When buying parts, you need to pay attention to the fact that there are fakes on the market. It is worth considering that the high cost justifies itself: the DLS system is cheaper than paying professionals.

Reviews
Among the feedback from Internet users there are positive and extremely negative comments. Most often they write that it is difficult to find parts for such a system in ordinary stores. We have to order them over the Internet, which requires a certain amount of time.
Those lucky ones who have acquired the DLS system, highlight a large number of advantages. Especially often leave detailed reviews by those who work with tiles for a long time. This allows them to compare traditional methods and this system. The advantages of new technologies such as DLS become noticeable only when working with large tiles, or in large areas. In the case of a correctly made foundation on a small area, the gain in time will be minimal.

Also in the reviews they write about the need to check the evenness of each element, which also takes a lot of time. Often, due to one uneven tile, all the leveling work can be wasted in the absence of a similar replacement part. You should pay attention to the adhesive composition that is used in the process, to which the masters pay attention.
In general, you cannot blindly rely on such a system and believe that it will do absolutely everything for you. You should correctly prepare the base, distribute the glue. Compliance with technology and accuracy is no less significant. In this case, in the form of a DLS system or any similar, you will get an excellent assistant when working with tiles.
See how to lay tiles using DLS in the next video.
Characteristics of tile laying by DLS system
The DLS installation technique has many advantages that greatly facilitate the installation of flooring. In order to more easily and evenly lay out the tiled surface, you need to use this system for laying the floor.
They create perfect coatings without considering the quality of the screed and the thickness of the adhesive. Thanks to the leveling of the tiles by the DLS method, you don’t have to worry about defects such as material displacement during the laying process and subsidence when drying. Using this method, you can save about 200% of the time that is usually spent with other methods.
Note! The stage of control of even joints and the tiled coating itself is very difficult to work, but if you understand it before installation, then there will be no difficulties.
There are three ways to lay ceramics that use the DLS system:
- To fix one tile, use the laying method, which has a name of the type "minus".
- If you have to repair work with the installation of two tiles, then in this case purposefully use the method of the type of "letter T".
- Using the plus type, you can immediately fix four elements.
 DLS Solid Ceramic Alignment Technology
The process of laying tiles with DLS system
The system of masonry tile surface DLS technique consists of the following components:
- The main component is the insert, which consists of plastic. Such parts will need at least 100 pieces.
- In the same amount as the previous part, wedge elements will be needed. They are installed by inserting inserts that align with clamps.
- The main tool in working with such a system is the clamp, which is used at all stages of installation.
Begin laying with the application of the main adhesive material on which the installation will be carried out.
 The method of applying adhesive material
The next step is considered, directly, installation. It is fixed with the main elements in which the wedges are installed. A clamp is used to level the entire surface. When the entire coating is dry, the wedges that remain with the hammer are knocked out.
 The way to align the wall tiles
Positive and negative sides of tile alignment in this way
Alignment of tiles occupies a separate place in the construction of flooring. The main advantages of this process are:
- Installation can be carried out with all types of tiles - both floor and wall. Using this system, the first row is smooth, after which you can create a direction for the subsequent rows of the wall plate.
- By laying 4 times faster than the normal process, you can save a lot of time.
- Wedges and clamps can be used not only once. After all, they are able to maintain their properties during repeated use.
- After the installation of tiled products, this technology remains the minimum amount of garbage.
- When laying the slab in this way, it is not necessary to be a professional. In this case, you can carry out the installation process yourself, without contacting the master.
- Installation work is carried out without seams. Since the possibility of tile failure is impossible during the application of the technology.
Negative parties are:
- A significant minus of the use of such technology are considered expensive components that are necessary for installation.
- The next nuance of this system is that the tile should be adjusted only before the adhesive base dries.
 The method of alignment of interplate seams
Note! Even if the price of components is relatively high, it will still cost less than the full payment for the entire installation. Also, all the items you purchased that are necessary for installation work can be used more than once, except for the base.